Step One – Draw Leaflets
The first step in how to draw a palm tree silhouette is to add the leaves. You don’t need to have perfect leaves, just make the base outline and erase it later. Then draw the leaflets. Each leaflet should be different from the other leaflets. It will give a more realistic look to the finished drawing. You can use tracing paper to help you with this step. After you’ve completed the guide, erase the base outline.
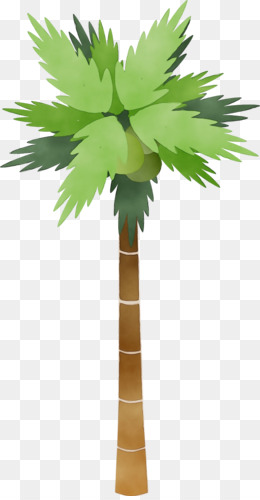
Step Two – Draw The Trunk
Next, create a curved trunk. Draw a curved line, which will make the trunk slant. Then, make a second pair of curved lines. The rachis is the middle part of a palm leaf. Shade the bottom part of the trunk using an upward pencil stroke. Then, shade the rest of the tree with the darker shades. Then, draw a final line to finish the drawing.
To add tone to the trunk, create a curved trunk with wide sides and narrow tips. You can draw this by using two pairs of curved lines. When drawing the curved trunk, you should shade the base with a darker color than the top part. You can also add a wobbly outline to the trunk to make the silhouette more realistic. After you’ve finished the base of the trunk, you can add the rounded leaves to complete the look.
Step Three – Draw Fronds
After you’ve finished drawing the trunk, add the fronds to give it texture. You can use this technique to draw other palm trees, too. And you can even use the same technique to draw a tree in any scene. It will look more natural than the last one, so be creative and use it! You’ll be surprised at the beautiful results you get! So go ahead, and start experimenting with the steps in this tutorial.
Read Also: What is the Spotsylvania Tree Stump?
Step Four – Painting and Toning
Then, paint the trunk and the fronds. Try to make the trunk thicker on the bottom and thinner on top. Using the full width of the brush for the trunk will give you the illusion of the tree having more volume than the upper portion. To draw the middle part, use two horizontal lines that curving in opposite directions. You can use this technique to make the entire outline of the tree more interesting.
Once you’ve completed the trunk, you can add details to the lower part of the palm tree by shading it with light. You can also include the beach at the bottom. The trunk of a palm tree looks best with a beach backdrop. If you want to add more details, you can also sketch the grass and sand hill. For a more realistic and accurate drawing, you can also include the sand hill and the grass at the bottom.
Then, you can add tone to the trunk and leaves. To make your palm tree silhouette look more realistic, you should shade the base of the trunk with dark pencil strokes. Then, add the sand hill and grass on the bottom. You can also incorporate small pieces of beach at the bottom of the trunk. Once you’re done with these steps, you can start shading the rest of the palm tree.
Conclusion
Adding tone will make your palm tree silhouette look more realistic. You can do this by shading the bottom of the trunk with dark lines. In the same way, you can also draw a palm tree with a striped trunk. The stripes are wider at the bottom and thinner at the top. This will help your palm tree look more realistic and more real. (thebeverlyhillsestates.com) The sand can also be shaded with light and dark colors.
After you have added the base of the palm tree, you can now add the trunk. The base of the palm tree should be straight, but it can be a little rounded. You can also add extra details like a sand hill or grass around the bottom. If you wish, you can also draw a beach on your palm tree silhouette. This will create a complete picture that will look real and not like a simplified one.